
Creating handmade rugs is a joyful journey that allows you to express your creativity. Imagine crafting something unique and personal that brightens your space! Not only does this process offer a sense of accomplishment, but it also brings several psychological benefits. For instance, rugs can help you feel more grounded, reduce stress, and even enhance your mood through color psychology. With the right materials and techniques, you can dive into the world of rug making by following a Step-by-Step Guide to create stunning pieces that reflect your style. So, are you ready to start creating handmade rugs?
Key Takeaways
Choose the right materials for your rug based on durability, cost, and environmental impact. Natural fibers like wool offer softness, while synthetic options provide affordability.
Gather essential tools like scissors, looms, and a beating comb to make the rug-making process smoother and more enjoyable.
Design your rug with colors and patterns that reflect your personality. Nature-inspired tones create a calming atmosphere, while unique patterns can serve as stunning focal points.
Follow proper knotting and weaving techniques to ensure your rug is durable and visually appealing. Practice makes perfect, so embrace the learning process.
Regularly clean and maintain your handmade rug to keep it looking its best. Store it properly to prevent damage and extend its life.
Materials for Handmade Rugs
Choosing the Right Material
When it comes to creating your own handmade rugs, selecting the right materials is crucial. Different materials offer unique textures, durability, and aesthetics. Here’s a quick overview of some popular options:
Material Type | Description |
|---|---|
Natural fibers | Includes wool, cotton, silk, and jute. Wool is the most common due to its durability and softness. Cotton is affordable and easy to maintain. Silk adds a luxurious touch, while jute is eco-friendly. |
Synthetic fibers | Includes nylon, polyester, and polypropylene. Nylon is durable and stain-resistant. Polyester is soft and budget-friendly. Polypropylene is moisture-resistant, making it great for outdoor rugs. |
Choosing the right material depends on the type of rug you want to create. For example, if you’re looking for a cozy area rug, wool might be your best bet. If you want something more affordable and easy to clean, cotton could be the way to go.
Here are some factors to consider when making your selection:
Durability: Think about where you’ll place the rug. High-traffic areas need more durable materials.
Cost: Your budget will influence your choices. Natural fibers like wool and silk tend to be pricier than synthetic options.
Environmental Impact: Natural materials are renewable and biodegradable, while synthetic fibers can take hundreds of years to decompose.
Essential Tools for Rug Making
Once you’ve chosen your materials, it’s time to gather the tools you’ll need. Here’s a list of essential tools for rug making:
Tool Name | Function |
|---|---|
The Shear (Scissors) | Used to clip the rug’s pile to an even level after weaving. |
The Horizontal Rug Loom | A portable loom that’s easy to dismantle and carry, perfect for nomadic weavers. |
The Vertical Rug Loom | A fixed loom that allows for more precise dimensions, ideal for sedentary weavers. |
The Rug Cartoon | A colored drawing on graph paper that guides you in design and color. |
The Rug Knife with Hook | Used to cut threads and assist in knot formation. |
The Rug Beating Comb | Tightens the threads of the weft against the knots, ensuring compactness of the rug. |
Having the right tools makes the process smoother and more enjoyable. You’ll find that investing in quality tools pays off in the long run, as they help you create a beautiful and lasting rug.
With the right materials and tools in hand, you’re well on your way to crafting a stunning handmade rug that reflects your personal style!
Preparation Instructions
Designing Your Rug
Designing your rug is an exciting step that allows you to express your creativity. Start by thinking about the colors and patterns you want to use. Nature-inspired tones like earthy browns, soft greens, and warm neutrals are trending right now. These colors can create a calming atmosphere in your space.
When it comes to patterns, consider what resonates with you. Popular design patterns include hand-tufted rugs, which are great for anchoring seating areas. You might also want to explore artistic patterns that can serve as stunning centerpieces in your room.
Here’s a quick overview of some design aspects to consider:
Design Aspect | Description |
|---|---|
Popular Design Pattern | Hand Tufted Rugs are favored for their ability to anchor seating areas. |
Color Trends | Nature-inspired tones like earthy browns, soft greens, and warm neutrals. |
Texture | Rich textures are emphasized to add depth and softness to modern interiors. |
Artistic Patterns | Eye-catching artistic patterns are becoming popular, serving as centerpieces. |
Remember, your color choices can significantly impact the perceived value and aesthetics of your rug. Colors can evoke emotions and reflect your personality, so choose wisely!
Setting Up Your Workspace
A well-organized workspace is essential for effective rug making. Start by ensuring your workspace is at chest or eye level. This setup helps you avoid hunching or straining your back. Consider using an anti-fatigue mat to reduce foot and hip pain while standing for long periods.
Here are some ergonomic practices to keep in mind:
Strengthen your core with exercises like planks to support your back during rug making.
Take micro-breaks to rotate your wrists and roll your shoulders to prevent muscle fatigue.
By following these simple instructions, you’ll create a comfortable environment that enhances your creativity and productivity. With your design in mind and a well-set workspace, you’re ready to dive into the step-by-step instructions for making your beautiful handmade rug!
Step-by-Step Rug Making Process
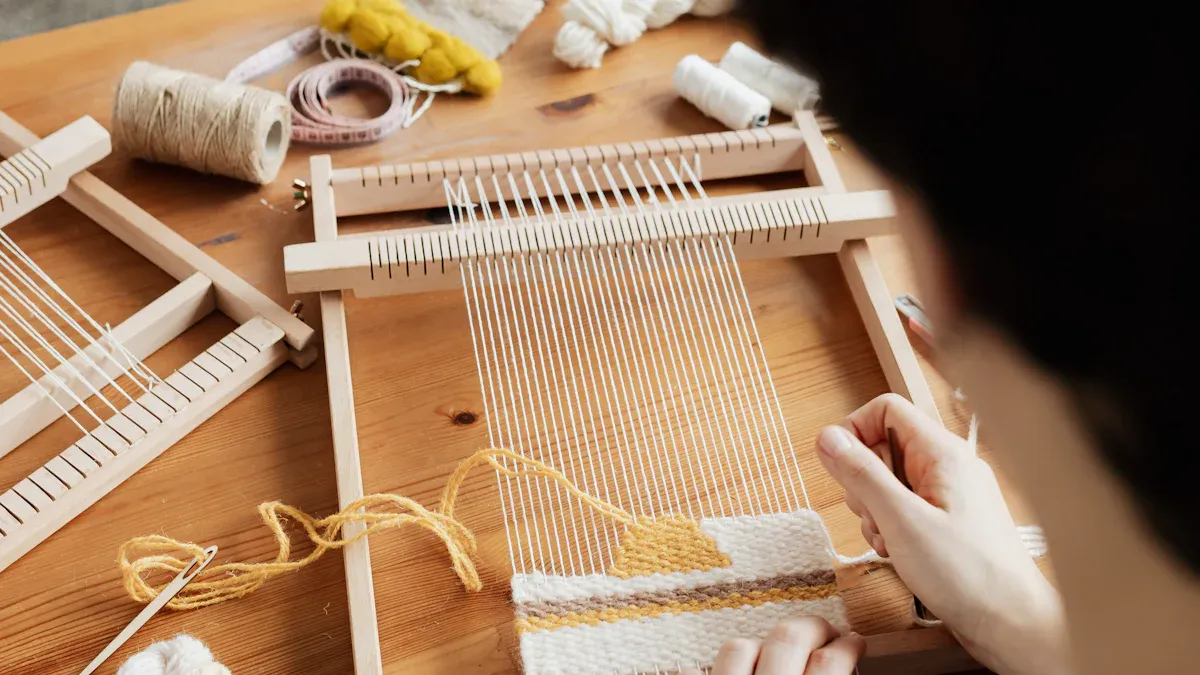
Weaving Techniques
Now that you have your materials and workspace ready, it’s time to dive into the exciting world of weaving! Different techniques can significantly affect the durability and texture of your handmade rugs. Here’s a breakdown of some popular weaving methods:
Weaving Technique | Description | Examples |
|---|---|---|
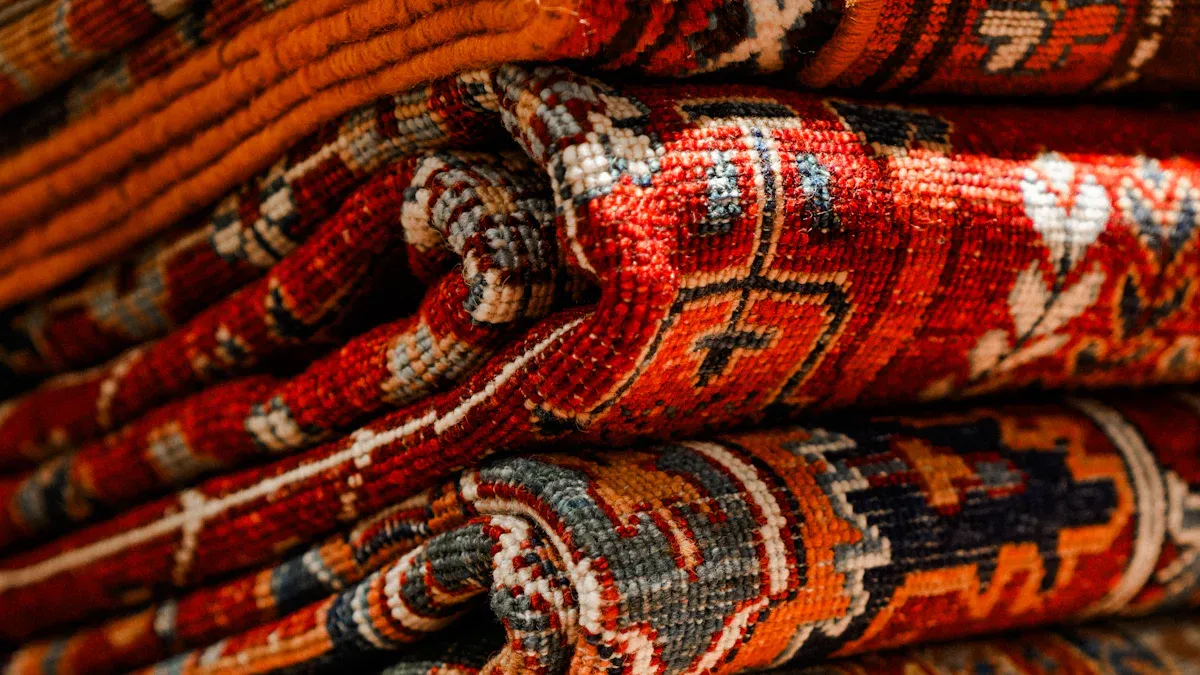
Hand-Knotted | Knots tied onto a loom, creating intricate patterns. | Persian and Turkish rugs |
Flat-Weave | Interwoven threads without a pile, resulting in a flat design. | Turkish kilims, Indian dhurries, Navajo rugs |
Hand-Tufted | Yarn loops pushed through a fabric base, allowing for detailed patterns. | Budget-friendly alternatives to hand-knotted rugs |
Hand-Knotted Rugs: Known for their fine knotting and beautiful patterns, these rugs often take months or even years to complete. They are durable and luxurious, making them a great investment.
Flat-Weave Rugs: Lightweight and durable, these rugs are made without a pile, making them ideal for high-traffic areas. They’re easy to maintain and can add a modern touch to your decor.
Hand-Tufted Rugs: Created using a tufting gun, these rugs offer detailed patterns at a lower price point. They’re quicker to produce but may not last as long as hand-knotted rugs.
When choosing a weaving technique, consider how it affects your rug’s durability and texture. Hand-knotted rugs are dense and luxurious, while hand-tufted options are more affordable but less durable. Flat-weave rugs are lightweight and easy to care for, making them versatile for various settings.
Knotting and Aligning Patterns
Knotting is a meticulous process that requires precision. Each knot you tie contributes to the overall design of your rug. Here are some tips to help you with knotting and aligning patterns:
Knot Counting: Count each knot as you go to ensure your design stays accurate. If you miss a knot, it can throw off the entire pattern. Use a simple tally system to keep track.
Knot Beating: After tying knots, use a beating comb to align them. This technique helps correct any warping in the design and ensures that your rug looks neat and professional.
Pattern Alignment: Measure warped segments and use tools to align the knots. This step is crucial for maintaining the integrity of your design. If you notice a mistake, don’t hesitate to fix it right away.
Tip: If a knot is missing, you can surgically repair it by checking against a map of your design. This attention to detail will elevate your craftsmanship and result in a stunning handmade rug.
As you weave and knot, remember that practice makes perfect. Each rug you create will improve your skills and reflect your unique style. So, embrace the process and enjoy the journey of crafting your own beautiful handmade rug!
Finishing Your Handmade Rug
Trimming and Shaping
Once you’ve woven your rug, it’s time to give it that polished look. Trimming and shaping are essential steps in the finishing process. Here are some best practices to achieve professional results:
Pull your canvas tight and move your hand with steady confidence to achieve crisp edges.
Use the outline-first method to lock in shapes and trim as you go to maintain color separation.
Trim stray fibers immediately after finishing a specific shape or color block to keep colors distinct.
When you’re ready to trim, hold your clippers at a 90-degree angle to the rug’s surface. Work in smooth, consistent motions. This technique helps you remove the top layer of fuzz, creating a uniform height across the rug. Angle the clippers toward the line you’re defining for precise trimming.
Final Touches
After trimming, it’s time for the finishing touches that enhance your rug’s appearance and longevity. Consider these techniques:
Washing: This step removes dirt and can give your rug a fresh finish.
Stretching and Blocking: Align and flatten your rug to its intended dimensions.
Edge Binding and Fringing: This prevents unraveling and adds aesthetic appeal.
Final Inspection and Touch-Up: Correct any imperfections to enhance quality.
Be on the lookout for common flaws during this stage. You might encounter issues like dye bleed, mildew, or frayed edges. If you notice any wrinkles, pressing can often reverse them if no structural damage occurred.
Taking the time to properly finish your handmade rug will not only improve its look but also extend its life. So, embrace these final steps, and enjoy the satisfaction of completing your beautiful creation!
Care and Maintenance for Rugs
Cleaning Your Rug
To keep your handmade rugs looking their best, regular cleaning is essential. Here are some effective cleaning methods based on the type of rug you have:
Type of Rug | Cleaning Method |
|---|---|
Wool & Cotton Rugs | Blot stains with a dry towel, scrape debris, use a soap and water mix, and avoid excessive heat. |
Synthetic Fiber Rugs | Similar to wool, blot stains, scrape debris, and use a soap and water mix. |
Natural Fiber Rugs | Vacuum regularly, blot spills, and avoid dry cleaning. Use professional services for stubborn stains. |
Shag Rugs | Use spray extraction and a wool-approved product; avoid pulling yarn. |
Viscose Rugs | Avoid cleaning; if necessary, dry clean only and test for discoloration. |
Washable Rugs | Spot clean with soap and water; machine wash for larger spills. |
Regular vacuuming helps maintain the rug’s appearance. Spot cleaning is crucial for longevity. Avoid placing rugs in high-traffic areas to minimize wear.
Storing and Maintaining
When it comes to storing your handmade rugs, follow these steps to prevent damage:
Thorough Cleaning: Clean your rug thoroughly to remove dirt and odors before storage.
Stain Identification and Removal: Identify and treat any stains to prevent mold and mildew.
Careful Rolling for Storage: Roll the rug tightly to avoid creases.
Securement in Protective Rug Bags: Use breathable protective bags to shield the rug from dirt and allow ventilation.
Climate Control: Store in a climate-controlled area if possible.
Avoid Direct Sunlight: Keep the rug away from direct sunlight to prevent fading.
Elevate from the Floor: Place the rug on wooden pallets or racks to protect it from moisture.
To maintain the color and texture of your handmade rugs, vacuum regularly, ideally once a week, using a vacuum without a beater bar. Spot clean immediately to prevent stains from setting. Deep cleaning is recommended every 12 to 18 months. Rotating the rug every six months helps prevent uneven wear and sun damage. For fringes, gentle brushing is advised, and keeping pets away will help avoid damage.
By following these care tips, you can ensure your handmade rugs remain beautiful and durable for years to come!
Creating your own handmade rugs is a rewarding experience! You’ve learned about choosing materials, designing, and the weaving process. Remember, experimenting with different designs can add depth and personality to your space. 🌟
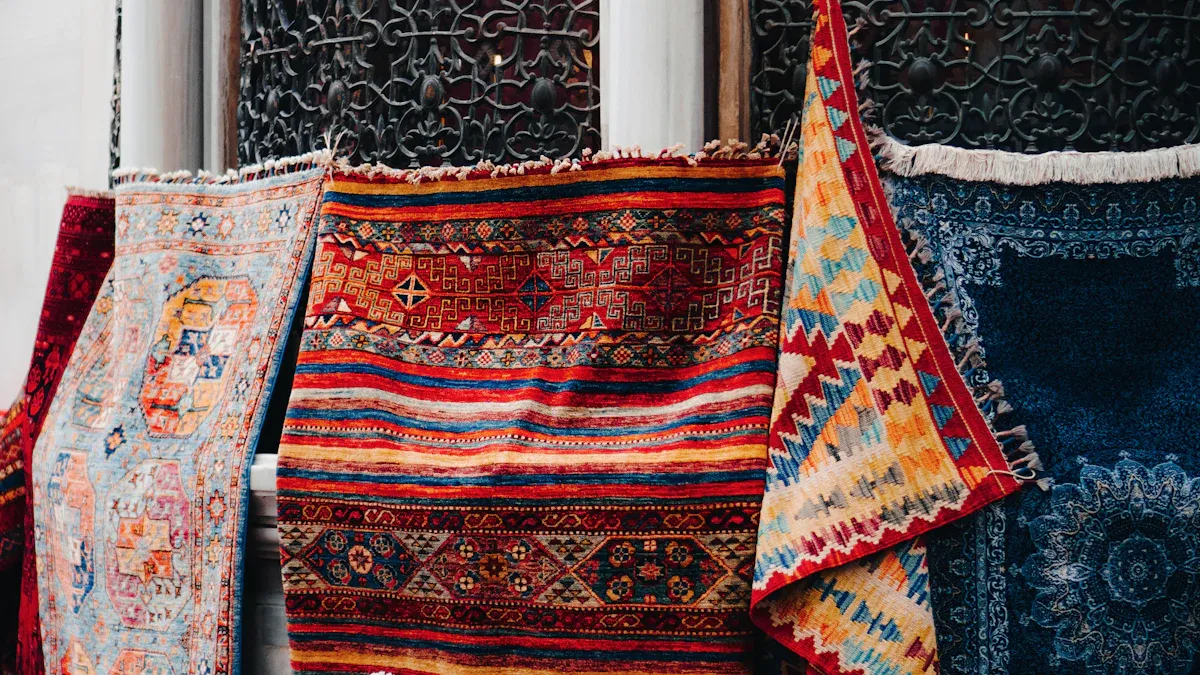
Layering rugs enhances visual interest and helps define areas in your home.
Each rug you make reflects your unique style and cultural background.
So, don’t hesitate to try new techniques and colors. Practice makes perfect, and every rug you create will showcase your creativity.
