
You can absolutely sew beautiful curtains for your home in just one day! It’s a fun project that brings a personal touch to your space. Start by gathering your materials, measuring your windows, and picking the perfect fabric. Don’t worry if you’re new to this; many beginners find fabric selection and measuring the most challenging. Just take your time, and enjoy the process!
Key Takeaways
Gather essential supplies like fabric, measuring tape, and a sewing machine before starting your curtain project.
Accurate measurements are crucial; measure your windows carefully to ensure a perfect fit for your curtains.
Choose the right fabric based on your style and the room’s needs; heavier fabrics block light while lighter ones allow airflow.
Materials for Sewing Beautiful Curtains

Essential Supplies
To get started on your curtain-making journey, gather these essential supplies:
Fabric: Choose a fabric that suits your style and the room’s decor. Consider durability and how it will hang.
Measuring Tape: Accurate measurements are crucial for a perfect fit.
Sewing Machine: A reliable machine makes the sewing process smoother.
Thread: Match the thread color to your fabric for a seamless look.
Scissors: Sharp scissors will help you cut fabric cleanly.
Pins: Use pins to hold fabric pieces together while you sew.
Choosing the right fabric is vital. Different fabrics can affect the durability and appearance of your curtains. For example, heavier fabrics like velvet provide excellent insulation and light control, while lighter fabrics like linen allow for better airflow, making them ideal for warmer climates.
Optional Customization Items
Once you have your essentials, consider these optional items to enhance your curtains:
Lining: Adding a lining can improve opacity and quality, giving your curtains a more polished look.
Decorative Ribbon: Use ribbon to add flair and personality to your curtains.
Curtain Styles: Explore different styles like Rod Pocket, Tab Top, Grommet, and Café Curtains to find what fits your space best.
Fabric Glue or Fabric Fusion Tape: These tools can simplify assembly, especially if you want to avoid sewing.
The right curtain hardware can also elevate your project. Selecting the right rods and brackets not only supports your curtains but also adds visual interest to your home decor. Properly chosen hardware enhances the overall look and functionality of your curtains, making them a standout feature in your space.
With these materials in hand, you’re well on your way to creating beautiful curtains that reflect your personal style!
How to Sew Easy Curtains: Preparation
Measuring Windows
Accurate measurements are key to a successful curtain project. Start by measuring the width and height of your windows. Use a measuring tape and measure from the top of the window frame to where you want the curtains to fall. For width, measure across the frame, adding a few extra inches for fullness. If you’re unsure, consider asking a professional for help. They can account for architectural features that might affect how your curtains hang.
Choosing Fabric
Selecting the right fabric can make or break your curtains. Think about the weight of the fabric. Heavier fabrics like velvet create elegant folds and block light effectively. On the other hand, lighter fabrics like sheer linen allow natural light to filter through, giving a breezy feel. Here are some options to consider:
Heavy Fabrics: Great for insulation and light control.
Light Fabrics: Perfect for a soft, flowing look.
Preparing the Workspace
A well-organized workspace is essential for sewing. Clear a large area, like a dining table or the floor, to spread out your fabric. This prevents any dragging or tension that could lead to crooked seams.
Tip: Take regular breaks to stay focused and avoid fatigue. Also, use safety equipment like thimbles to protect your fingers while sewing.
With these preparations, you’re ready to dive into your DIY sewing tutorial and create beautiful curtains for your home!
Sewing the Perfect Curtains: The Process
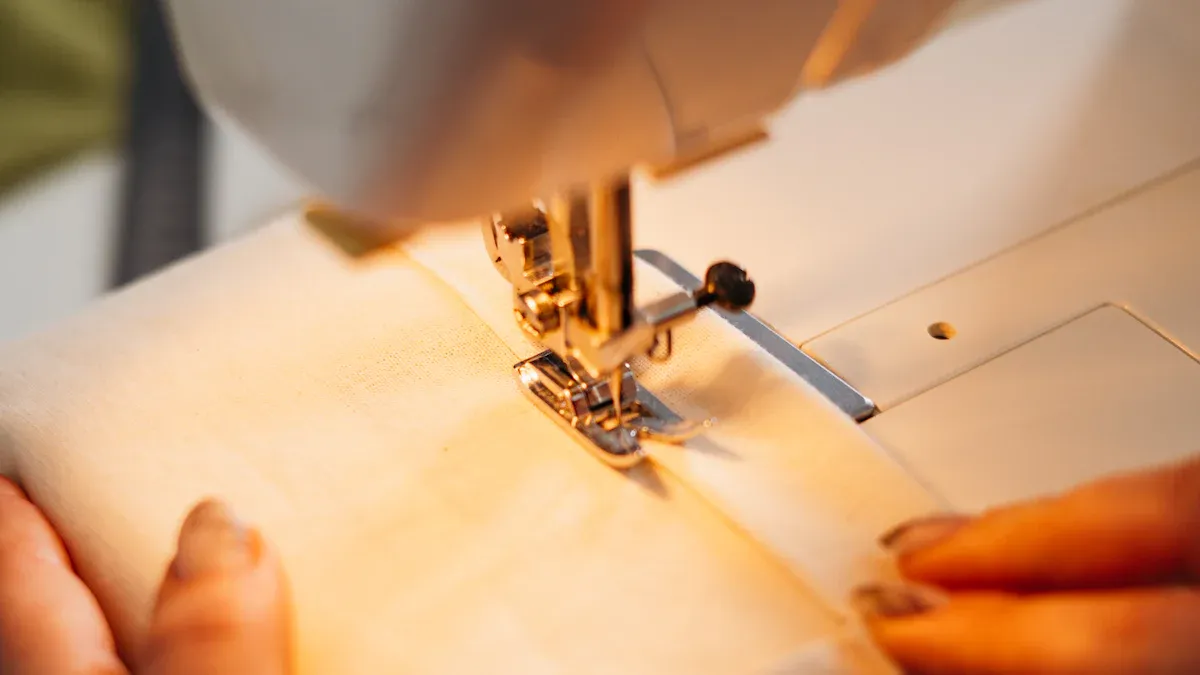
Cutting the Fabric
Cutting your fabric correctly is crucial for sewing the perfect curtains. Start by laying your fabric flat on a clean, smooth surface. Use your measuring tape to mark the dimensions you need. Here’s a simple step-by-step guide:
Measure Twice, Cut Once: Always double-check your measurements before cutting. This helps avoid mistakes that could waste fabric.
Cut on the Grain: Make sure to cut along the grain of the fabric. Cutting off-grain can lead to uneven hanging and misaligned seams.
Consider the Pattern: If your fabric has a pattern, pay attention to its direction. Mismatched patterns can create visual inconsistencies.
Tip: Common mistakes during the cutting stage include not measuring accurately, which can result in fabric being cut too short or too long. Always take your time to ensure precision.
Hemming Techniques
Hemming gives your curtains a finished look and prevents fraying. Here are some recommended techniques for achieving a professional finish:
Measure the Hem Length: Decide how long you want your hem to be. A standard hem is usually about 1 to 2 inches.
Use Hem Tape: Fold over the extra fabric at the bottom of the curtain and secure it with iron-on hem tape. This method is quick and easy.
Pin and Iron: Before you sew, use pins to mark the desired hem length. Iron the hem to create a crisp edge.
Following these steps will help you achieve a clean and polished look for your curtains.
Adding Curtain Rings or Tabs
Now it’s time to add the finishing touches! You can choose between curtain rings or tabs to hang your curtains. Here’s a quick comparison of both options:
Curtain Type | Advantages | Disadvantages |
|---|---|---|
Grommet Curtains | Modern look, ease of air flow, professional appearance | More expensive, may not suit all aesthetics |
Tab Top Curtains | Simpler installation, easier to clean, less moisture damage | Can look cheap if hung loosely, visible tabs |
For a more designer feel, consider using drapery pins. They provide a clean appearance without visible clasps. If you want a casual look, tie-top panels work well but may not be as durable for frequent adjustments.
Note: For daily use, hanging clips or ring clips are recommended due to their ease of movement. Heavier curtains may require pin hooks or a rod pocket method for better support.
With these steps, you’re well on your way to sewing the perfect curtains for your home. Enjoy the process and take pride in your DIY sewing tutorial!
Finishing Touches for Your Curtains
Ironing the Curtains
Ironing your curtains is essential for achieving a polished look. Follow these best practices to ensure a wrinkle-free appearance:
Use a buffer fabric: Place a pillowcase or sheet over delicate fabrics to protect them while ironing.
Apply starch if needed: For fabrics that wrinkle easily, use starch according to the product instructions.
Iron the back: This helps avoid damage to delicate materials.
Be cautious with silk or satin: Use a buffer and lightly spray with water for extreme wrinkles.
Iron pleats: Gather and iron pleats to enhance their appearance.
Iron across the width: Lightly spray the curtain and iron from top to bottom.
Hang the curtain: After ironing part of the curtain, hang it to prevent re-wrinkling.
Finish ironing: Continue ironing downwards, avoiding sharp angles to prevent bunching.
Hanging the Curtains
Now that your curtains are ironed, it’s time to hang them! Here’s how to do it evenly and securely:
Measure for Bracket Placement: Determine the height for your curtain panels and use a level for straight alignment.
Mark Bracket Placement: Use a tape measure and pencil to mark where the brackets will go.
Install Bracket: Use a stud finder to locate studs or install wall anchors if needed. Drill pilot holes and secure the brackets.
Level and Install the Other Bracket: Ensure the left bracket is straight using a level and secure it similarly.
Hang Your Curtains: Slide the curtains onto the rod and place the rod into the brackets, adjusting for evenness.
Using a drapery header can enhance your curtains’ appearance. It helps maintain the structure, preventing drooping or sagging under the fabric’s weight. A well-structured header makes your curtains look more professional and polished, even with lightweight fabrics.
With these finishing touches, your DIY sewing tutorial will result in beautiful curtains that elevate your home decor!
Sewing your own curtains can be a rewarding project that transforms your home decor. You’ll save money while customizing your space to fit your style. Plus, making curtains at home reduces textile waste and supports eco-friendly practices. So, roll up your sleeves and dive into this DIY sewing tutorial. You’ll feel accomplished after completing this project in just one day!
Remember, lined curtains can improve sleep quality and energy efficiency by blocking unwanted light.
FAQ
What type of fabric is best for curtains?
Choose a fabric that suits your style and needs. Heavier fabrics block light well, while lighter ones allow more airflow.
How long does it take to sew curtains?
You can complete this DIY sewing tutorial in just one day, making it a fun and quick project for your home.
Can I customize my curtains?
Absolutely! You can add linings, decorative ribbons, or choose different styles to enhance your home decor.
