Address
304 North Cardinal
St. Dorchester Center, MA 02124
Work Hours
Monday to Friday: 7AM - 7PM
Weekend: 10AM - 5PM
Address
304 North Cardinal
St. Dorchester Center, MA 02124
Work Hours
Monday to Friday: 7AM - 7PM
Weekend: 10AM - 5PM

Have you ever thought about making your own quilt? Imagine wrapping yourself in a cozy creation that you crafted with your own hands. Quilting can be a delightful journey for a beginner quilter. As you stitch together fabric pieces, you’ll find joy in each step. Completing your first quilt brings a sense of accomplishment that’s hard to beat! This beginner’s guide will walk you through everything you need to start your quilting adventure.
Choose 100% cotton fabric for your first quilt. It’s durable, easy to work with, and available in many colors.
Invest in essential tools like a rotary cutter, cutting mat, and quality thread. These will make your quilting process smoother.
Practice accurate cutting techniques. Use a ruler and a sharp rotary cutter to ensure your fabric pieces fit together perfectly.
Master basic sewing skills, such as sewing straight seams and maintaining a consistent seam allowance for a polished look.
Embrace mistakes as part of the learning process. Each quilt you make will improve your skills and boost your confidence.
When you start your quilting journey, selecting the right materials is crucial. The fabric and tools you choose can make a significant difference in your experience and the quality of your finished quilt. Let’s dive into the essentials!
For beginners, quilting cotton is the go-to fabric. It’s midweight and made from 100% cotton, which makes it easy to work with. You’ll find it in a wide range of colors and prints, allowing you to express your creativity. This fabric is sturdy enough to hide the quilt filling and stable enough to prevent stretching or warping while you cut and sew.
If you’re unsure where to start, consider using charm packs. These pre-cut fabric squares come in coordinated sets, making it easier to create beautiful patterns without the hassle of cutting your own fabric. Here’s a quick look at the pros and cons of charm packs:
Advantages | Disadvantages |
|---|---|
Variety: Offers multiple coordinated fabrics | Limited Fabric: Specific sizes can be limiting. |
Cost-Effective: Economical for beginners | Less Control: You can’t choose exact fabrics. |
Inspiration: Encourages creative design | Cost: Can be more expensive than yardage. |
Availability: Not all fabrics are available pre-cut. | |
Shrinkage: May shrink differently when washed. |
Having the right tools can make your quilting experience smoother and more enjoyable. Here’s a list of essential beginner quilt supplies you should consider:
Sewing Machine: This simplifies the quilting process significantly.
Rotary Cutter: It provides accuracy and ease compared to scissors.
Cutting Mat: Protects surfaces and helps you make precise cuts.
Quality Thread: Invest in high-quality thread like Aurifil for durability.
Walking Foot: This tool helps manage multiple layers of fabric during quilting, preventing bunching and puckering.
You might also want to invest in a thread stand. It allows you to use larger spools, which can be more cost-effective. Additionally, a seam ripper is a must-have for correcting mistakes, and safety pins are essential for holding quilt layers together during assembly.
Here’s a quick overview of the average costs for some basic quilting tools:
Tool | Average Cost | Description |
|---|---|---|
Seam Ripper | $4 – $9 | A crucial tool for correcting mistakes. |
Safety Pins | $5 – $10 | Essential for holding quilt layers together during assembly. |
Small Scissors | $9 – $15 | Necessary for trimming loose threads. |
Quilting Ruler | $33+ | Ideal for beginners, facilitating cutting both long and small fabric strips. |
Rotary Cutter | $25 – $30 | Invest in a name-brand model for efficient fabric cutting. |
Iron | $25 | A basic iron suffices for quilting needs. |
Ironing Board | $20 | A large ironing board is recommended to accommodate various fabric sizes. |
With the right fabrics and tools, you’re well on your way to creating your first quilt. Remember, the journey of quilting for beginners is all about learning and enjoying the process!
As a beginner quilter, mastering a few basic techniques will set you up for success. Let’s explore two essential skills: cutting fabric and constructing quilt blocks. These foundational skills will help you create beautiful quilts with confidence.
Accurate fabric cutting is crucial for achieving a polished look in your quilt. Here are some key techniques to keep in mind:
Use a Ruler: Always measure strip widths with a ruler for accuracy. This ensures your pieces fit together perfectly.
Sharp Rotary Cutter: Invest in a sharp rotary cutter and a self-healing cutting mat. These tools make cutting easier and more precise.
Straighten Edges: Before cutting, straighten the fabric edges. This step helps you avoid uneven cuts and ensures precision.
Different Ruler Sizes: Use various ruler sizes for different cutting needs. A larger ruler works well for long strips, while a smaller one is great for smaller pieces.
Tip: Press your fabric before cutting. This helps eliminate wrinkles that can affect cutting accuracy.
Here’s a quick overview of the most common fabric cutting techniques used by beginner quilters:
Start by pressing the fabric to avoid inaccuracies caused by wrinkles.
Square up the leading edge of the fabric to ensure straight cuts.
Ensure cuts are perpendicular to the fold line for precision.
Remember, the rotary cutter revolutionized fabric cutting for quilters since its invention in 1979. Before that, quilters relied on templates and scissors, which were less efficient. As a beginner, try different rotary cutters to find the one that feels most comfortable for you.
Once you’ve mastered cutting, it’s time to dive into constructing quilt blocks. This is where your creativity shines! Here are the basic steps involved:
Read and follow quilt patterns carefully.
Cut your fabric accurately, as we discussed earlier.
Sew straight seams to create classic quilt blocks.
Assemble your blocks with sashing and borders.
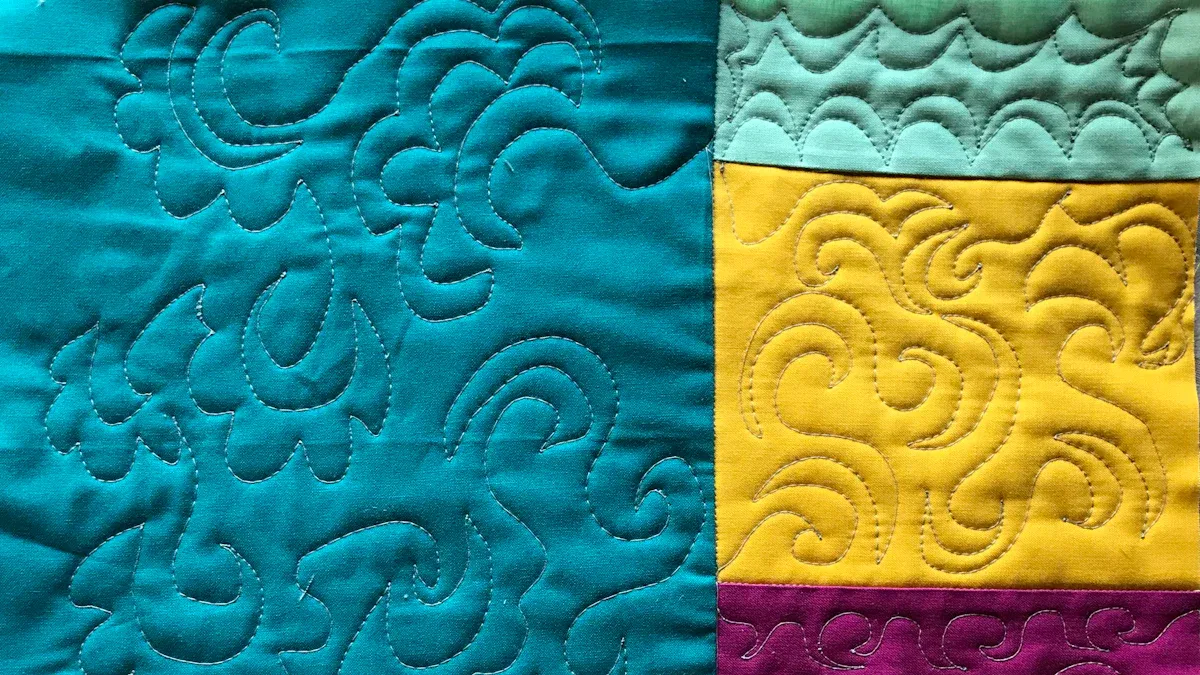
Quilt your project using straight-line or free-motion techniques.
Finally, bind your quilt for a finished, polished look.
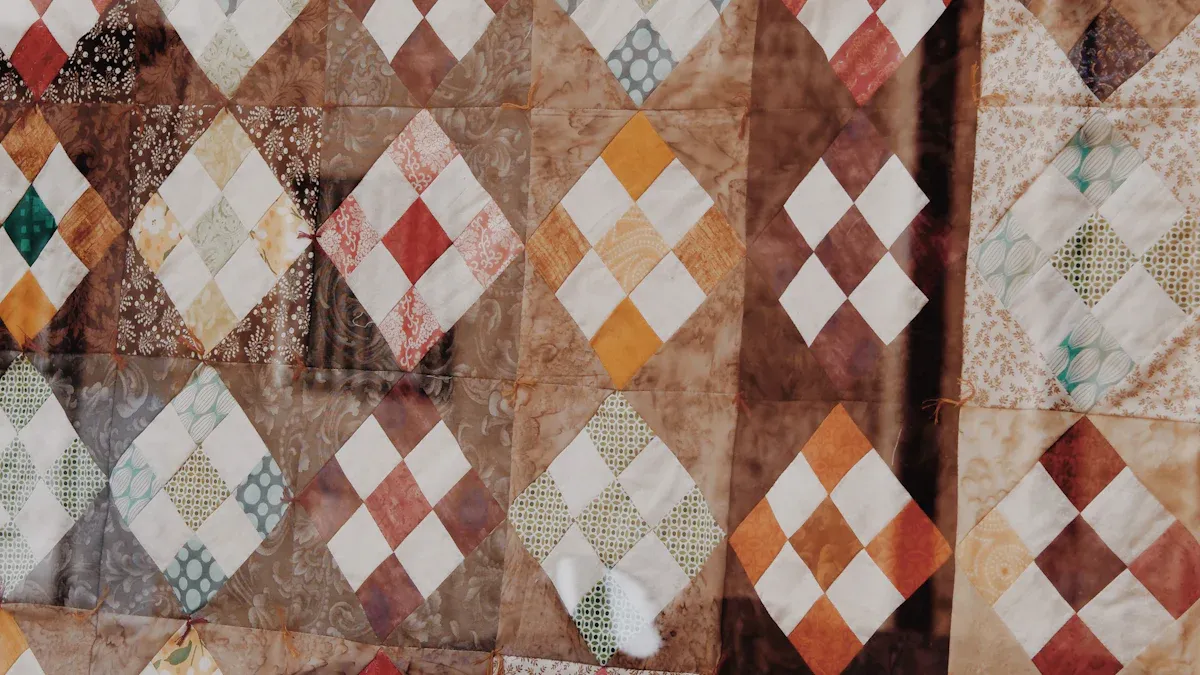
You can start with simple patterns like the Pinwheel or Hourglass blocks. These beginner-friendly designs will help you build confidence and skills.
Note: A simple baby-size quilt top (40” x 45”) may take anywhere from 3 to 9 hours to complete. Celebrate every milestone along the way!
For visual learners, check out these helpful tutorials on constructing quilt blocks:
Video Tutorial for Block 1
Video Tutorial for Block 2
Video Tutorial for Block 3
With practice, you’ll find that these techniques become second nature. Remember, every quilter started as a beginner, so don’t be afraid to make mistakes. Each quilt you create will improve your skills and boost your confidence!
As you embark on creating your first quilt, assembling the quilt top is an exciting step! Follow these simple steps to get started:
Preparing the Pattern: Read through your chosen pattern carefully. Note the size you want and circle any important numbers.
Preparing the Fabric: Decide if you want to wash your fabric. Washing can prevent future shrinkage but may also change the texture.
Chain Piecing: This technique involves sewing blocks together in a continuous chain. It speeds up the process and keeps your pieces organized.
Laying the Blocks Out: Arrange your sewn blocks on a flat surface. This helps you see how the colors and patterns work together.
Choosing the Border and Binding Fabric: Pick fabrics for the borders and bindings. Measure them accurately before cutting to avoid mistakes.
Quilting the Top: Decide on a quilting design. You can quilt it yourself or send it to a professional for a polished finish.
Tip: Avoid common mistakes like inconsistent seam allowances or skipping the pressing step. These can lead to unevenness in your quilt.
Once your quilt top is ready, it’s time to add batting and quilting layers. Batting is the filling that gives your quilt warmth and thickness. Here are some popular types of batting:
Batting Type | Characteristics | Best For |
|---|---|---|
Cotton | Soft, crinkly effect | Bed quilts |
Polyester | Affordable, high loft | Puffy quilts |
Wool | Warm, flowy | Winter quilts |
Bamboo | Lightweight, eco-friendly | Baby quilts |
Choosing the right batting affects your quilt’s warmth and durability. For instance, cotton offers great insulation, while polyester provides stability without shrinkage.
Layering your quilt correctly is crucial. Start with the backing fabric, then add the batting, and finally place the quilt top on top. Pin or baste the layers together to prevent shifting while you quilt.
With these steps, you’re well on your way to completing your ultimate beginner quilt! Enjoy the process and remember, practice makes perfect.
Every beginner quilter faces challenges along the way. Recognizing common mistakes can help you avoid frustration and improve your skills. Here are some frequent issues and tips to tackle them:
Issue | Description | Tip |
|---|---|---|
Inconsistent Seam Allowance | Slight deviations can lead to misaligned blocks and wavy borders. | Use a ¼” foot or seam allowance guides and test sew on scrap fabric. |
Cutting Corners (Literally) | Skipping careful cutting can result in misaligned patterns and gaps. | Double-check rotary cutter measurements and use a sharp blade. |
Forgetting the Backing Fabric | Beginners may forget to prepare enough backing fabric, causing issues during the quilt sandwich stage. | Buy at least 8–10 inches more than the quilt top’s dimensions. |
Thread Breakage During Quilting | This often happens due to incorrect tension or poor-quality materials. | Use fresh needles, clean the machine, and adjust tension settings. |
Taking On a Large Quilt as Your First Project | Large projects can feel overwhelming, affecting your confidence. | Start with smaller projects to build skills and confidence. |
Not Preparing the Quilt Sandwich Properly | Poor basting can lead to puckers or shifting during quilting. | Use spray baste or pins generously and smooth each layer. |
Wavy Borders | This occurs when borders are not measured correctly, leading to uneven edges. | Measure the quilt top in three places and average the lengths for accurate border cutting. |
Ignoring Small Tension Issues | Small tension problems can ruin the appearance of quilting lines. | Check tension on a sample quilt sandwich before starting the actual project. |
Forgetting That Mistakes Are Part of the Process | Embracing mistakes is essential for growth in quilting skills. | Learn from each mistake and keep sewing to improve. |
Fabric misalignment can be frustrating, but you can prevent it with a few simple strategies. Here are some effective methods:
Use plenty of pins to keep fabric in place. This prevents slipping and sliding during sewing.
Consider glue basting or using clips as alternatives to pins for a secure hold.
Maintain a consistent seam allowance by using a seam guide or a presser foot designed for accuracy.
If you find puckers in your quilt, ensure you baste your layers properly before quilting. If puckers occur, you can either hide them by quilting more densely in that area or seam rip the affected area and restitch it carefully to eliminate the pleat.
Remember, every quilter makes mistakes. Embrace them as part of your learning journey. Craftsy offers great resources to help you improve your skills and tackle more complex projects.
With these tips and tricks, you’ll navigate the common pitfalls of quilting with confidence. Keep practicing, and soon you’ll be creating beautiful quilts that reflect your unique style!
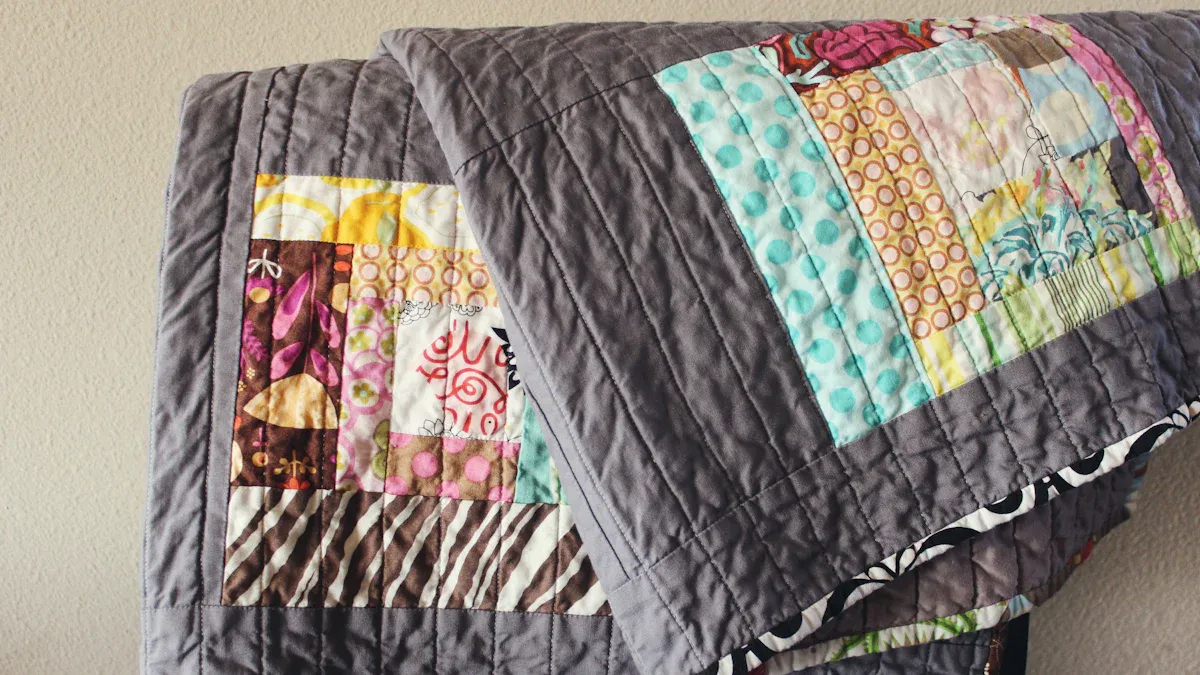
Binding is the final touch that transforms your quilt from a project into a finished masterpiece. It not only enhances the quilt’s appearance but also protects the edges. Here are some popular binding techniques you can choose from:
Binding Technique | Description | Recommended Use |
|---|---|---|
Pillowcase Method | An easy method that may leave a raw edge. | Small fabric collage quilts |
Traditional Binding | Involves cutting and stitching strips, folding, and sewing to the quilt. | General use, especially for larger quilts |
Machine Binding | Fast and secure finish, suitable for quilts that will see heavy use. | Quilts for frequent use, like baby quilts |
Mitered Corners | Technique for finishing corners neatly. | All types of quilts |
Blind Hem or Slip Stitch | A method for finishing the binding on the back without going through all layers. | For a clean finish on the back |
Using a blind hem or slip stitch gives your quilt a polished look. Fold the tape to create mitered corners for a neat finish. If your quilt will see a lot of use, machine binding is the way to go.
Proper binding contributes significantly to your quilt’s longevity. It acts as a protective barrier around the raw edges, preventing fraying and unraveling. This reinforcement makes your quilt more resistant to damage, ensuring it withstands regular use. Plus, binding stabilizes the quilt top, preventing stretching or sagging over time.
Taking care of your quilt ensures it lasts for years to come. Here are some best practices to keep your quilt looking great:
Gently shake your quilt outside to remove dust and pet fur.
Use a low suction vacuum to clean, if necessary, but test first on fragile fabrics.
Gently brush off stubborn pet fur with a garment brush or lint roller.
Choose a washing method: handwashing is recommended for fragile quilts, while machine washing is suitable for utility quilts.
Dry your quilt properly: air drying is preferred to prevent shrinkage, while machine drying should be done on low heat.
Store your quilt correctly in a dry, clean, and well-ventilated area, using acid-free materials to prevent yellowing.
By following these steps, you can ensure your quilt remains a cherished item for years to come. Remember, the care you give your quilt reflects the love and effort you put into quilting it!
You’ve learned so much about quilting! From choosing the right fabrics to mastering basic techniques, you’re ready to take the plunge. Remember, practice makes perfect. Each quilt you create will sharpen your skills. Here are some key takeaways to keep in mind:
Basic Sewing Skills: Sew straight seams and maintain a consistent seam allowance.
Cutting Skills: Use quality tools and practice safe cutting techniques.
Pressing Skills: Master proper pressing for accurate piecing.
Don’t hesitate to share your experiences or ask questions. Join online communities to connect with fellow quilters. Happy quilting!
