Address
304 North Cardinal
St. Dorchester Center, MA 02124
Work Hours
Monday to Friday: 7AM - 7PM
Weekend: 10AM - 5PM
Address
304 North Cardinal
St. Dorchester Center, MA 02124
Work Hours
Monday to Friday: 7AM - 7PM
Weekend: 10AM - 5PM


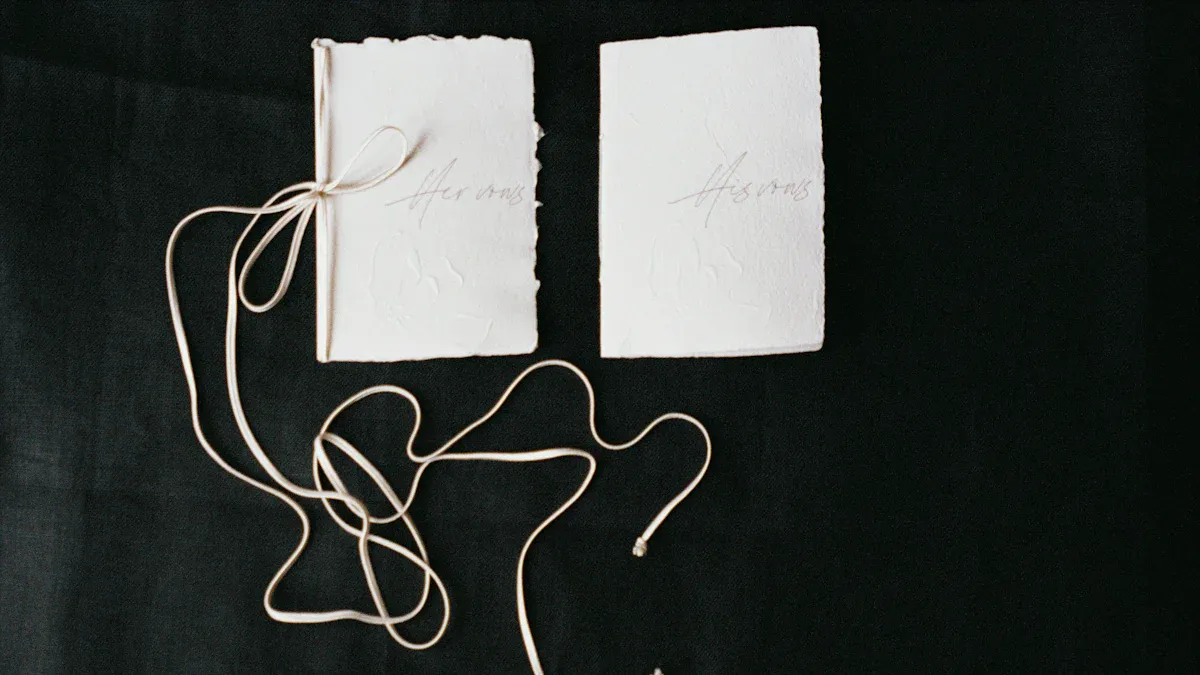
Handmade cards bring a unique personal touch that store-bought options just can’t match. You can tailor these creations for all occasions, whether it’s a birthday, holiday, or just to say thank you. The effort you put into crafting a card shows you care, and studies reveal that receiving such cards can alleviate feelings of loneliness and foster emotional connections.
Here are a few reasons why handmade cards matter:
They make recipients feel valued and appreciated.
The personal touch strengthens bonds between people.
Crafting these cards allows you to express your creativity and share your feelings.
So, grab some supplies, and let’s dive into the joy of making your own handmade cards!
Handmade cards add a personal touch that makes recipients feel valued and appreciated.
Gather essential supplies like cardstock, adhesives, and cutting tools to start your card-making journey.
Use decorative elements like color combinations and metallics to enhance the visual appeal of your cards.
Personalize your cards with unique touches, such as handwritten notes or shared memories, to deepen emotional connections.
Experiment with different designs and techniques to express your creativity and make each card special.
Creating beautiful handmade cards starts with gathering the right materials. You don’t need to break the bank; just a few essential supplies can set you on the right path. Let’s explore what you’ll need!
To kick off your card-making journey, here are some basic supplies you should have on hand:
Card stock: This is the foundation of your cards. It comes in various colors and thicknesses, allowing you to choose what fits your design best.
Adhesives: You’ll need glue, tape pens, or foam pads to stick your designs together. Reliable adhesives ensure your creations hold up over time.
Cutting tools: Scissors, guillotines, and craft knives help you achieve clean edges and detailed cuts. Investing in quality tools makes a big difference in your final product.
Additionally, consider adding these items to your toolkit:
Stamps: They allow you to personalize your cards with messages and designs.
Ink pads: These ensure crisp impressions, enhancing the overall look of your cards.
Now that you have your basic supplies, let’s talk about decorative elements that can elevate your handmade cards. Here are some popular options:
Decorative Element | Description |
|---|---|
Color Combinations | Popular combinations include pink, yellow, and teal; rusty orange and turquoise; red, orange, and pink; lime green and apple green. |
Metallics | Sophisticated metallics like gold, silver, and bronze are trending, often used in heat embossing and embellishments. |
Interactive Designs | Three-dimensional shaker embellishments are gaining popularity for their fun and personalized touch. |
Clean and Simple Designs | A minimalist approach is trending, focusing on a clean palette with minimal adornment while maintaining personality. |
Using these decorative elements can help you create cards that stand out. Remember, the key is to let your creativity shine through.
By choosing eco-friendly materials, you not only create beautiful cards but also contribute to a healthier planet. Handmade cards often have a smaller ecological footprint compared to mass-produced options. They utilize sustainable practices, making them a great choice for environmentally conscious crafters.
Now that you know what materials to gather, you’re ready to start crafting your unique handmade cards for any occasion!

Creating handmade cards can be a fun and rewarding experience. Let’s explore some easy handmade card ideas that you can use for birthdays and thank you notes. These designs are perfect for beginners and can be adapted for various occasions!
Birthday cards are a great way to celebrate someone special. Here are some simple ideas to get you started:
Birthday Candles Card: Paint bright lines for candles and add details with a thinner brush. This design is colorful and festive!
Birthday Gifts Card: Create rectangle and square shapes to represent gifts. Add details and a heartfelt message to make it personal.
Bold Happy Birthday Card: Write “HAPPY” in capital letters and overlay “birthday” with a black pen. This simple yet striking design makes a statement.
Floral Birthday Card: Create a rainbow hue background and sketch an easy bunch of flowers. This adds a lovely touch to your card.
Rainbow Birthday Card: Paint a rainbow using a compass and flat brush, then add a cheerful message. It’s bright and cheerful, perfect for any birthday celebration!
When making birthday cards, remember to add personal touches. Hand-lettered messages or patterned paper can enhance your design. You can also use ribbon or twine for a finishing touch. A sprinkle of glitter or sequins can add a celebratory flair, but use them sparingly to keep it classy.
Thank you cards are essential for expressing gratitude. Here are some popular handmade card ideas that are easy to create:
Card Design | Description |
|---|---|
DIY Thank You Card with Dovetail Butterfly | Features butterflies and florals, appealing to recipients. |
Charming Mandala on a Watercolor Thank You Card | Uses black cardstock and metallic watercolors for a unique look. |
White Heat Embossing on Colored Cardstock | Delicate bouquet embossed on a blue background for depth. |
Simple Nesting Flowers Layering Die Set | Mini slimline card with simple color blocking. |
Floral Thanks Stamp Set | Dry embossed background with a floral cluster and prominent sentiment. |
Quick and Easy One-Layer Thank You Card | Easy to stamp and mass produce with rainbow ink colors. |
CAS Monochromatic Thank You Card with Snowdrops | Quick die-cutting technique for a clean design. |
These designs are not only simple but also allow you to express your creativity. You can mix and match elements from different designs to create something unique.
As you craft your handmade cards, avoid common mistakes like using the wrong cardstock weight or poor adhesive choices. These can lead to flimsy cards or ones that fall apart. Take your time with stamping techniques to avoid smudges and misalignment. Adding layers can enhance visual interest, making your cards more appealing.
With these easy handmade card ideas, you’re well on your way to creating beautiful birthday and thank you cards that your friends and family will cherish!
Stamps and ink can transform your handmade cards into stunning creations. Here’s a simple step-by-step guide to help you master this technique:
Plan Ahead: Before you start stamping, sketch your design. This helps you avoid mistakes, especially with repeated patterns.
Stamp Masking: Use masking tape to cover areas of your card. This keeps your borders clean and prevents ink from bleeding into unwanted spots.
Layered Stamping: Combine multiple stamps to create a cohesive look. Just remember to keep your alignment in mind for a polished finish.
Kiss Stamping: Start with a light color for your shape, then add a darker background pattern. This technique creates unique effects that add depth to your card.
Using contrasting colors can make your designs pop. For instance, pairing a bright ink with a dark cardstock can create a striking visual impact. Don’t hesitate to experiment with different color combinations!
Adding personal touches to your DIY handmade cards makes them even more special. In a world dominated by digital communication, a handmade card conveys emotions that quick online messages often lack. Here are some ideas to enhance your cards:
Include unique elements related to the recipient, like a ticket from a shared event.
Use materials that the recipient loves, such as a favorite fabric snippet.
Add a handwritten note expressing your feelings to deepen the card’s meaning.
Personalization is key to creating meaningful connections through cards. It shows that you care and have put thought into your creation. A cohesive design that reflects the recipient’s interests can enhance the overall impact of your card.
Remember, making handmade cards is all about expressing yourself. So, let your creativity flow and enjoy the process!
Creating unique handmade cards allows you to express your creativity and make each card special. Let’s dive into some exciting layout and color scheme ideas, along with unique embellishments that can elevate your designs!
When it comes to layouts and color schemes, the right choices can make your handmade cards stand out. Here are some popular trends for 2024:
Soft Pastels: Think pale pinks, soft lavenders, and serene blues. These colors create a soothing visual experience, perfect for occasions like baby showers or sympathy cards.
Bold Monochromes: Single-color designs in deep blues or vibrant yellows offer a minimalist yet striking aesthetic. This style works well for modern birthday cards.
Earthy Tones: Colors like moss green, mud brown, and sunset orange reflect a focus on nature and sustainability. These tones are great for cards celebrating outdoor events or environmental themes.
Eco-Conscious Designs: Incorporate botanical prints and recycled materials to emphasize your commitment to the planet. This approach resonates well with eco-friendly recipients.
Retro Revival: Nostalgic elements from the ‘70s and ‘80s, including vintage typography, are making a comeback. Use these styles for fun, quirky cards that evoke fond memories.
Minimalist Chic: A clean look with ample white space continues to dominate upscale card designs. This style is perfect for elegant occasions like weddings or anniversaries.
Understanding color theory can also help you choose the right colors for your cards. For example, red often symbolizes energy and passion, making it less suitable for welcoming a new baby. Instead, opt for calming colors like blue or yellow to convey joy and tranquility.
Adding unique embellishments can take your handmade cards to the next level. Here are some trending ideas to consider:
Enamel dots enhance geometric designs like mandalas.
Combine enamel dots and sequins for added shine.
Use enamel dots to create shapes and borders.
Replace flower centers with enamel dots or gemstones for a fun twist.
Create letters using enamel dots, especially vowels, for a playful touch.
Incorporate vellum as a flap or to matte sentiments, adding depth to your design.
Use metallic thread for subtle shine and texture, giving your cards a sophisticated finish.
Personalizing your cards with photos and custom messages can significantly increase their sentimental value. Here’s why:
Personal photos and messages make your handmade cards unique and reflective of shared experiences.
This uniqueness fosters a deeper emotional connection between you and the recipient.
Personalization shows effort, care, and attention to detail, enhancing the card’s overall impact.
By exploring these creative handmade card ideas, you can craft cards that not only look beautiful but also carry heartfelt messages for every occasion!
Making handmade cards brings joy and satisfaction that you can’t find in store-bought options. The process of crafting allows you to express your creativity while creating something truly special. Plus, studies show that crafting can reduce stress and improve your mood.
So, don’t hesitate to experiment with your designs! Try out different ideas, materials, and techniques. Share your creations with friends and family; they’ll appreciate the effort you put into each card. Remember, it’s the thought and care behind your handmade cards that make them unforgettable.
Tip: Keep a journal of your card-making ideas to inspire future projects!
You’ll need cardstock, adhesives, cutting tools, stamps, and ink. These basic supplies will help you create beautiful cards for any occasion.
Add personal touches like handwritten notes, photos, or unique embellishments. Tailoring your cards to the recipient makes them feel special.
Absolutely! Using recycled materials is a great way to create eco-friendly handmade cards. It adds character and helps the environment.
Start with simple designs like birthday candles or floral patterns. These ideas are easy to follow and allow you to express your creativity.
Take your time with measurements and adhesive choices. Ensure you use the right cardstock weight and practice stamping techniques to avoid smudges.
